Written by Jose Vicente
Índice
Businesses are constantly evolving and this is reflected in their websites: targets change, services offered change, existing products are optimized, etc. This means that the analysis needs are different from those foreseen in the initial implementation and that the implementation of tools such as Google Analytics has to be changed from time to time.
The change process of implementing analytics often involves the coordination of several resources, ideally within the same organization. In the worst case, we will have to recommend the change to our client, who will have to ask his development company for it, and so on until we reach the programmer who makes the changes in the code. With each step in the process, communication times and delays accumulate.
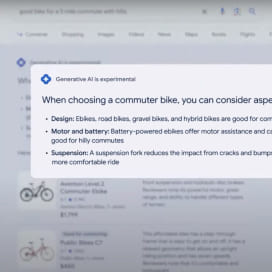
Google’s tag manager allows us to make changes to our site’s tags without having to resort to technical staff.
When the change in the analytics is to monitor something in the medium or long term, a delay of a few days is not decisive. But what if we want to make a change in the analysis for, for example, a specific promotion? In these cases the loss of several days of data may be critical to the analysis. To solve this type of situation we have the possibility of implementing Google Tag Manager. Google’s tag manager allows us to make changes to our site’s tags without having to resort to technical staff. The system is not perfect and on many occasions, if our site does not generate the data we need to analyze, we will have to resort to the programmers, but the possibility of this happening will decrease substantially.
Advantages of using Google Tag Manager
As we have already seen, the main advantage of the tag manager is to give the analysts the possibility to modify the tracking tags without having to resort to the technical staff, but there are others:
- Code cleanup: Google’s Tag Manager only adds the container code to our site. If we want to add more tags it does it internally without increasing the amount of generated source code.
- Performance: by running asynchronously, the execution of the tags does not affect the site’s loading speed.
- Integration with Google products: adding other Google tools or their functionalities is very easy.
- Progressive migration: although it is highly recommended to migrate all tags to the Google manager, the new ones can coexist with the ones we already have in place.
- Tag management: the use of a tag management panel makes it possible to have a control system of the inserted tags, avoiding duplication or loss of data.
- Version control: in case we make a mistake, we can always go back to the previous version of our tags.
How to install Google Tag Manager
The first step to start using Google Tag Manager is to create an account.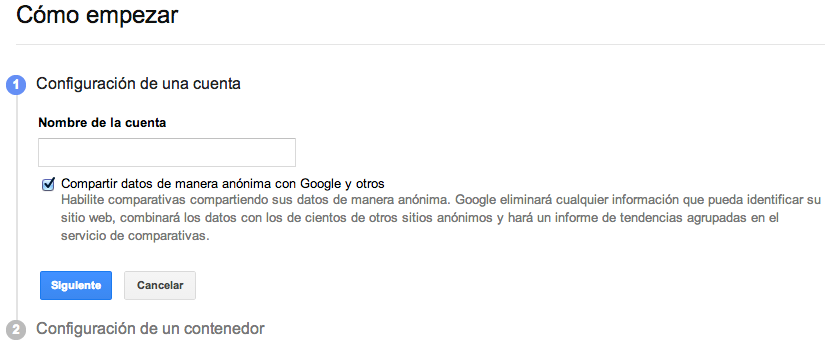
With our account we can create the containers in which to include Ads, Analytics and Floodlight tags. The container is implemented on all pages of the website.
In the configuration it will ask for the name, the domains of the site where it will be implemented and the time zone.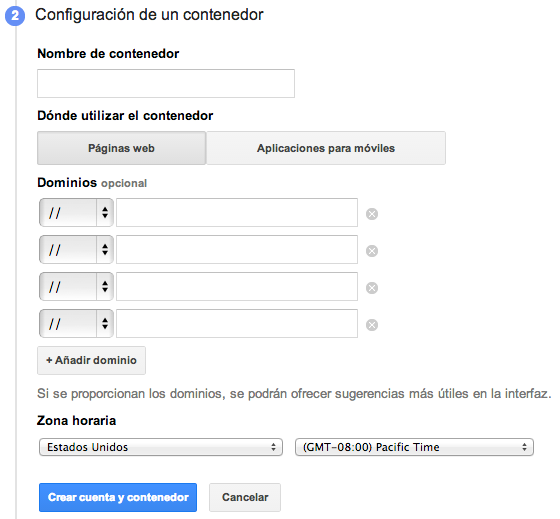
After creating the container, we can implement it by copying the code provided by the tool after the tag of our site. On the same page it will suggest the installation of our first labels. Normally we will start by installing the Google Analytics tag, so let’s see an example and in this way we can also learn how the Tag Manager is structured.
Elements of the label manager
Before starting to configure a tag we must understand how the tool is structured. We will always make changes on a draft of our site container. This means that all the changes we make will not be displayed immediately but will be saved in this draft. With this draft we will be able to preview and debug its operation, but the changes will not be effective until we generate a version and publish it. This versioning system allows us to revert to a previous version of our labels in case of a configuration error.
A container has 3 types of elements: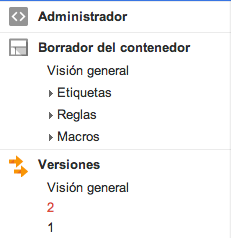
- Tags: these are JavaScript fragments that send information to third parties, one of these third parties may be Google itself. An example of a tag can be the Google Analytics tracking code or the generation of an event.
- Rules: are conditions that can be evaluated as true or false at the time of execution. They obtain information from macros and are used to evaluate whether a tag should be executed. An example tag is “All pages” which is always true since it compares the macro {{url}} with any type of URL.
- Macros: contain values at runtime and are used to evaluate rule conditions or pass data to tags. There is also a data layer with which, through programming (you can see that we have not forgotten the programmers), we can pass customized data to the macros and use them in our labels.
Example tag: Google Analytics
Having understood the Tag Manager structure let’s look at an example of creating an Analytics visitor tracking tag.
We start by creating a new label from the container draft overview and in the configuration we select:
- A name for the label.
- Select the Google Analytics → Universal Analytics tag type.
- The tracking ID of the property, code UA-XXXXXXXXXXXXXX-X.
- The type of tracking: in this case page view.
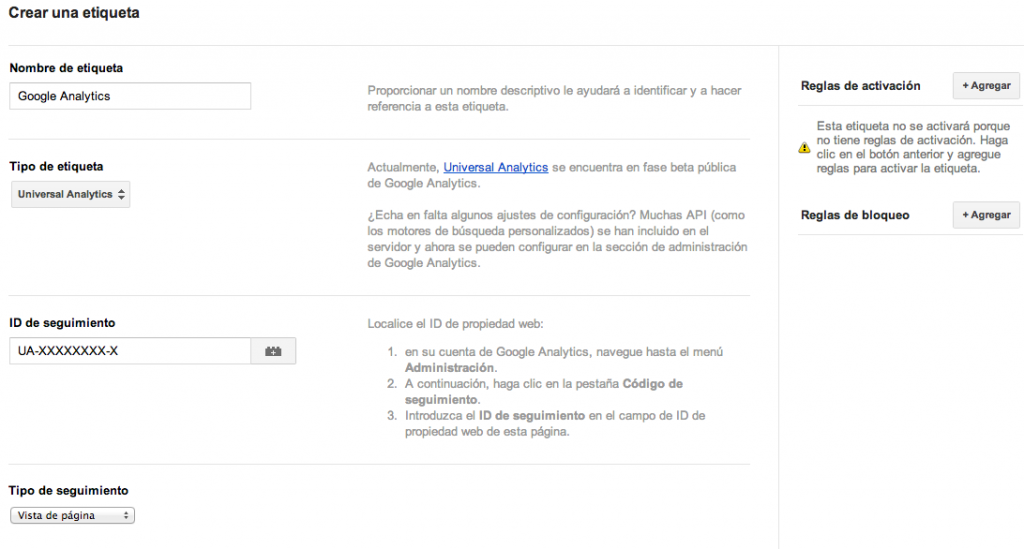
As you can see on the right side of the screenshot, we must specify at least one tag activation rule. In this case we will select the default rule “All pages” because we want the visits of all the pages of our site to be recorded.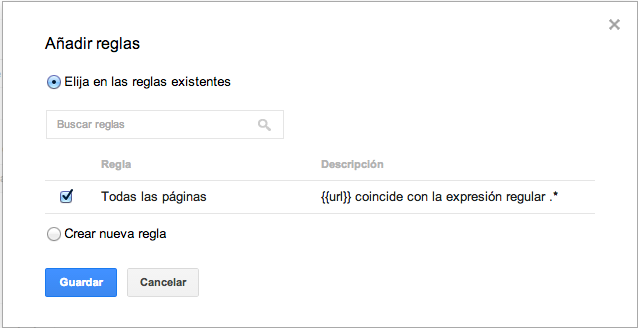
This rule returns true when the URL (value you get from the macro {{url}}) matches any value.
We save the configuration and with this we have in the draft of our container a label that will always be executed by the activation rule “All pages” which in turn gets the value of the macro {{url}}.
For these changes to be effective we must create a new version with the current draft and publish it. To do this we go back to the draft overview and from here publish the draft as a new version with the “Publish” button.
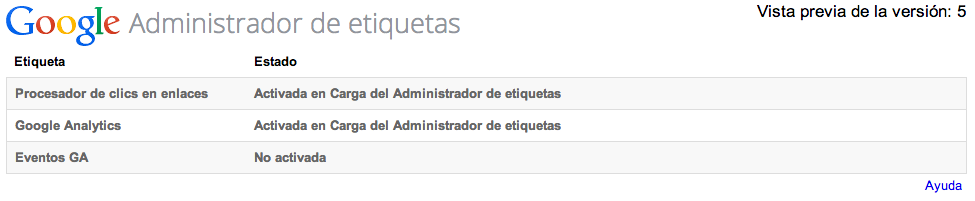
The administrator offers us the possibility to test before publishing the container, to do this we use the “Preview” button and it allows us to do so:
- Quick Preview: a preview of the draft container without the need to create a version first.
- Test in debug mode: add a debug layer at the bottom of the browser with the status of each of the tags of our container.
- Share: generates a link that we can share with other people even if they are not GTM users so that they can preview and debug the container.
As we have seen, although Google Tag Manager does not manage in all cases to avoid resorting to programmers, it does reduce the frequency considerably. If we take into account that it avoids the inclusion of more JavaScript in the source code of our page and that with this we improve the optimization, its use is totally recommended.