

Index
Previously we saw how to create a website with WordPress specifically the steps to follow in order to get our hosting space, create our database and install WordPress to have a website ready to go.
Now we will see how to start giving life to our website by configuring the necessary attributes, installing a WordPress theme that gives a specific look to our website, and writing our first pages or blog posts.
Configure settings and add users
There are data and options of our website that we can configure from the WordPress desktop, some of which can be found in the following sections of the desktop menu:
Settings
General: title and description of the site, should contain the name of our company or the domain we purchased, and should describe the purpose of our website, what it is dedicated to, etc. We can also add our email to receive notifications of administration, time zone and language of our website.
Reading: we can specify whether our home page will be a specific page (static page) or a page containing the list of the latest blog entries. We can also specify which page will be the home page and which will be the blog page, when we have created pages (we will see how to create them in the next section). In addition, an interesting option is to discourage search engines from indexing our site. It is advisable to activate it only when our website is finished and with content that we consider should be taken into account by Google and other search engines.
Other settings that we can configure are the options of the comments or the format of the permanent links, being able to make our web present friendly URLs easily.
Users
Add new: at the beginning only the user that we configured with the installation of WordPress will be created, but we may be interested in creating more users who will collaborate on the web when adding content, blog posts, etc… We can create them and specify their email addresses so that they can enter, and assign them administrator privileges if we want them to be able to modify more relevant aspects of the website such as plugins, or subscriber profile if they are only going to have the right to create and edit their own content.
2. Create pages and content
The structure of the web will be based on the pages we have created. From the Pages section of the menu we can create as many as we want, and also make one page a child of another. Some examples of pages could be: Home, Services, Contents, Gallery, Blog, Contact….
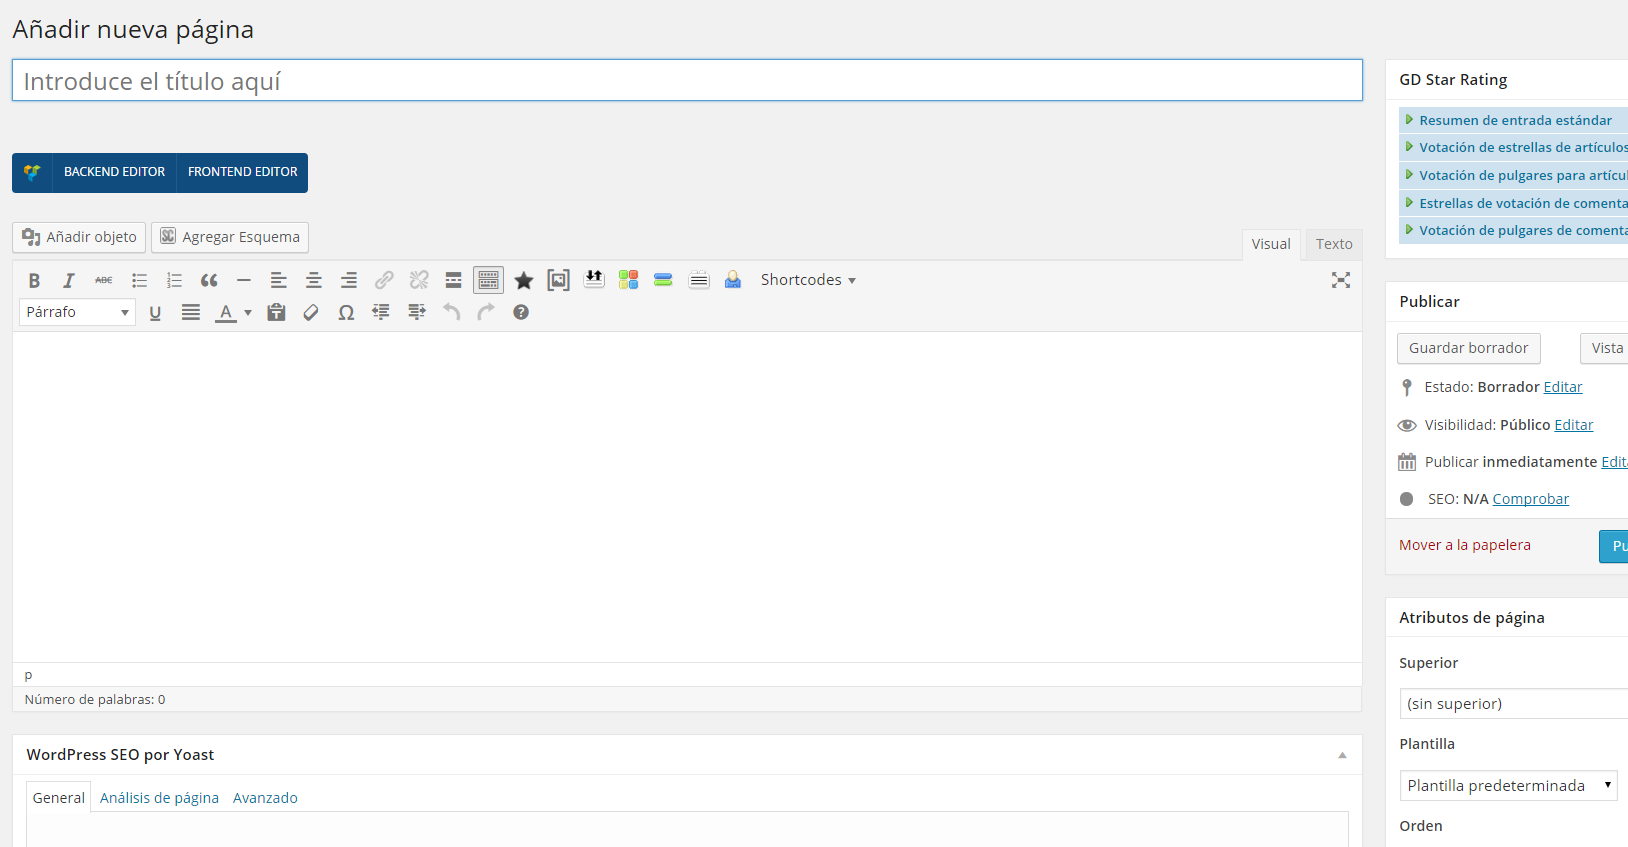
When we create a page, we should add a title, specify which URL will have (it is recommended that it is friendly and that it is like the title), write content, and optionally we can add a featured image, specify if it will have a top page, what template it will have, if it will have footer and sidebar, and depending on the plugins we have installed we will see more or less options that we can add to the page (for example, user rating, title styles and breadcrumbs, visual editor to write and add content more comfortably, etc.). The pages can be edited in visual mode or in text mode format), by clicking on the corresponding tabs as shown in the following image:
In addition to pages, WordPress allows us to have our blog on the same website, so we can create posts in the same way we create pages, but from the Posts section. We must decide which page will be the one that lists our blog posts, and which page will be the home page, as we saw in the previous section on Reading settings.
We also have a image gallery that can be completed from the section Mediaor simply every time we add images from pages or blog entries (with the button Add object(as shown in the image above when we create a page), will be saved in this media gallery.
3. Customize the appearance of our website
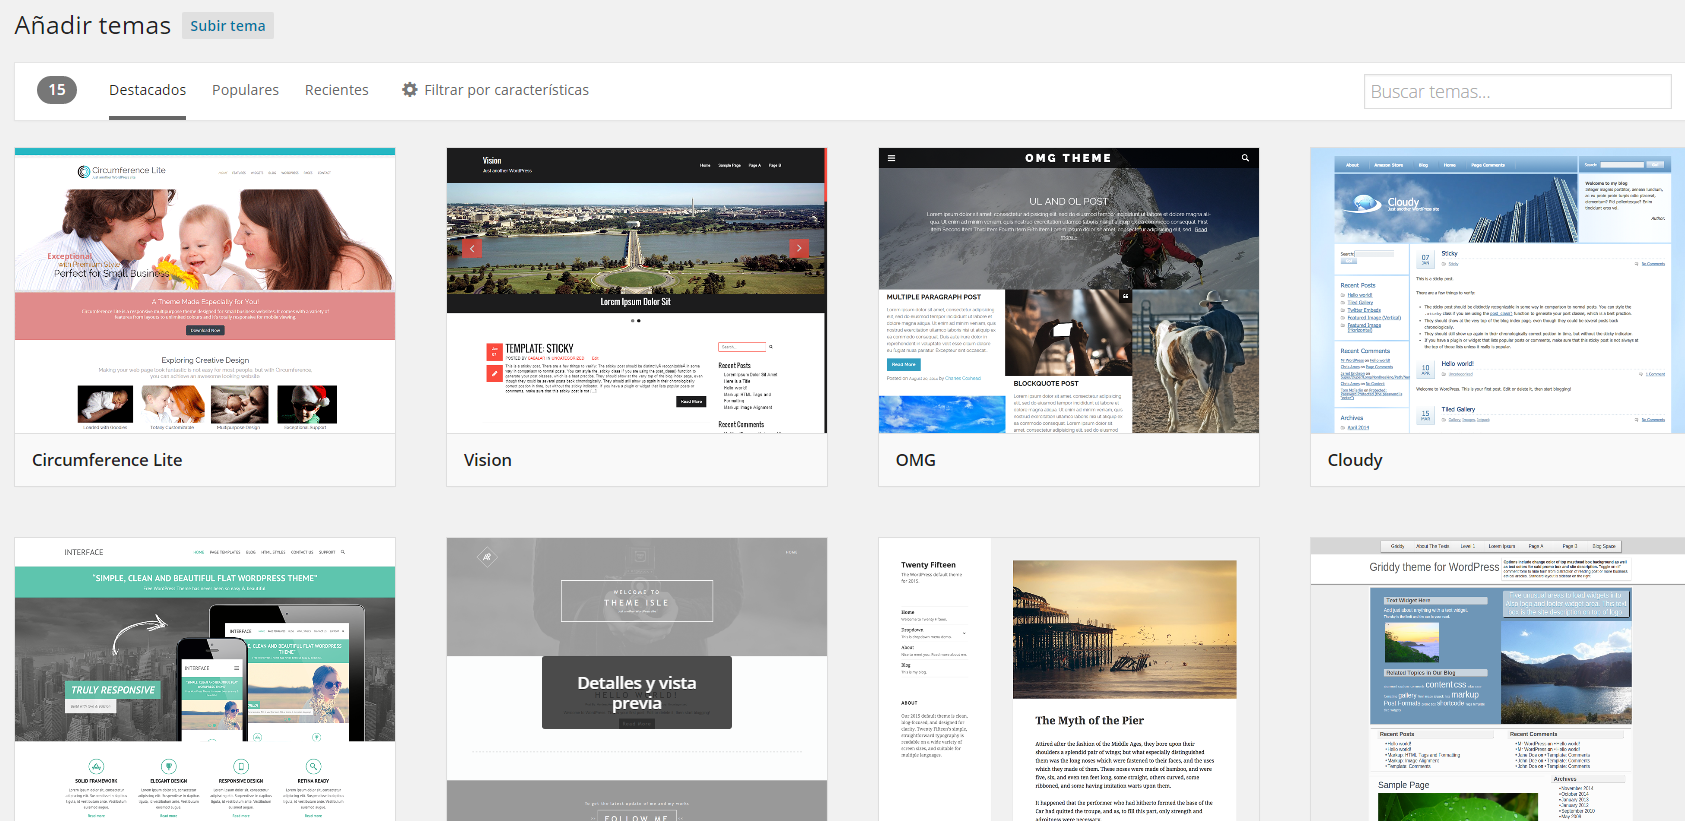
The Appearance option will be visited very often when customizing the look and feel of our website. Here we find the Themes section, where by default we will have one installed, but we can search for more by clicking on Add new and install one that we like according to the general appearance that gives the web. Once we have chosen the theme we like, which can be free or paid, we install it and activate it, and once activated we may see more options on our WordPress desktop.
Each theme has its own custom settings, but basically there are several things they all have in common that we should customize:
- Widgets: these are sections of the website with their own content, the most typical being thesidebar and the footer. We can add custom text blocks, images, plugins, contact forms…
- Style Editor: in the Editor option we are offered a text box where we can write our custom CSS code, having total freedom to create our own styles for the web or modify the ones included in the theme we have installed.
- Menus: we can create and customize menus, for example a menu that goes at the top of the web, and add the options and pages that we want each menu item to be.
Other aspects of the style that we can configure are theheader, adding our logo or the content we want (title, contact information, search engine, icons…), fonts, deciding what style to apply to texts and titles, background colors or images, etc. As each theme usually has different options and organized in different ways, it is recommended to browse through all the options in the WordPress menu to discover everything we can configure to leave the web to our liking.
4. Growing our website
Our website will be as big and customized as we want it to be. We can install plugins that complete functionalities that we are looking for, create categories for the pages and blog posts to classify them as we want, add more elements such as contact forms, portfolios, image carousels… A website is not made in a day, but is constantly changing and expanding.
So if we want to be successful with our website, we recommend to maintain it often and never believe that it is finished, but keep improving it and experimenting with it.