

Written by Alberto Gomis
Index
If you have ever wanted to set up your own website and didn’t know what to do or how to start, a very practical solution is to use WordPress.
A website consists of a set of files and directories stored on a server, which we normally access from a browser by typing its URL, thus loading the home page that we have configured. To start a simple website, it would be enough to have the basic HTML files in the root directory, such as index.html, and the folders we use for other files, such as a folder for images, another one for CSS styles, another one for JavaScript files… WordPress firstly, it solves this part of creating these files and folders, since as a tool it consists of a file system already prepared to run on the web with PHP, and secondly, once installed, we will use it to create our pages and give them our style and content. Let’s take a look at the steps to follow:
Step 1: Contract a hosting service
We will not go into details here, but you can contract hosting and domain plans with many companies, choosing on the one hand the desired domain name, if it is free, and on the other hand obtaining space on a server where we will host our website, as well as other files, databases, email… Depending on our needs and economic possibilities, we will hire one service or another. WordPress itself offers hosting plans that you can consult. Once we have our newly contracted hosting, it is normal that if we access our domain we will see some example page that the hosting company will have set by default. The installation consists of copying the WordPress folders and files in our web root directory. To do this we must download the latest version of WordPress that can be found on their website in Spanish at https://es.wordpress.org/. Once downloaded the compressed file, we must upload the contents of the wordpress folder to the root directory of our website, either by FTP or through the administration panel provided by our hosting service. Before we must have removed the example files that were there, and then we copy there the folders included in wordpress, which are: the wp-admin, wp-content, wp-includes folders, and several files such as the index.php and other configuration files.
Step 2: Create a database
It will be used by the tool to manage the pages and all the content that the website will have. Of course the hosting service we have contracted must have at least one database, which must also be MySQL, which is what WordPress uses. We must consult our hosting administration panel and see the section where we can create databases and users. We will give the database a name, ideally the same as our domain (in lower case and without spaces or strange symbols), and create a user with a name and password, who has permissions to access and manipulate the database we have just created.
Step 3: Install and configure WordPress
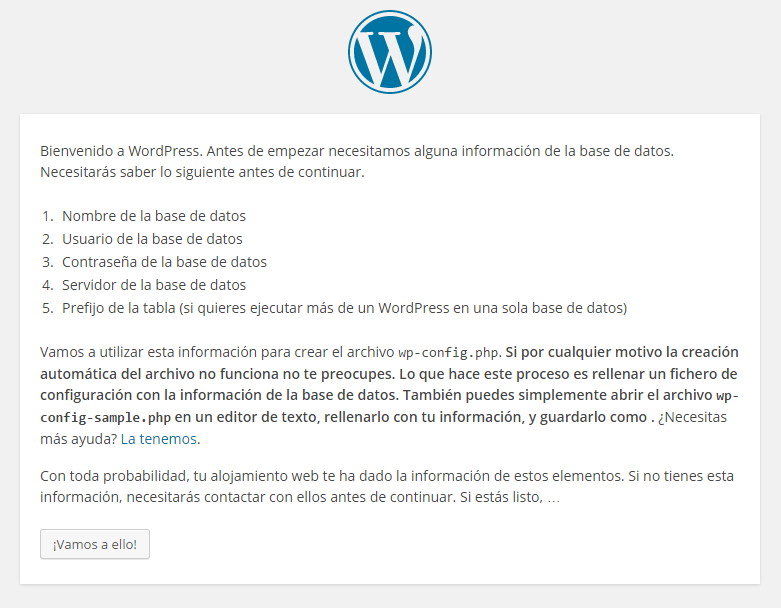
Once we have copied what we downloaded to our root folder and created the database, we access the URL of our domain, and we will see a WordPress welcome page with instructions for installation. Clicking on the button takes us to the next page where we are asked for the data of the database we created earlier: its name, the user name and password, as well as the database server (which by default is localhost if we had the database in our local computer, or the server where we have hosted the database of our hosting), and the prefix of the tables of the database, that we will leave it as it is.
Two things can happen at this point in the installation:
- The installation has worked correctly. If everything went well, the next screen will show us an install button and will ask us to create a user with which we will enter the WordPress administration panel.
- The installation has failed. We may have mistyped some data in the database, we should check it. If we are sure that we have written everything correctly, we have to configure it manually. What WordPress does at this point of the installation is to create and configure a configuration file called wp-config.php in the root directory with the database data to create the necessary tables, but this sometimes fails. To create the wp-config.php file, we go to the root directory, and we will see that a wp-config-sample.php file already exists. We can make a copy and call it wp-config.php, or rename it directly if we don’t need that example file. We edit it, and we will see four lines that are the ones that we must configure with our data of the database:
/** The name of your WordPress database */
define(‘DB_NAME’,‘datafilledname‘);
/** Your MySQL user name */
define(‘DB_USER’,‘username‘);
/** Your MySQL password */
define(‘DB_PASSWORD’,‘password‘);
/** MySQL host (most likely you won’t need to change it) */
define(‘DB_HOST’,‘localhost‘);
Once we have created and configured the wp-config.php file, we go back to our website from the browser and repeat the above steps, possibly skipping the step of entering the database data as they are already configured in the configuration file. If we continue to have problems, we will have to carefully review our database and the user we created, the password, the server, etc. or start over.
Step 4: Accessing the WordPress Desktop
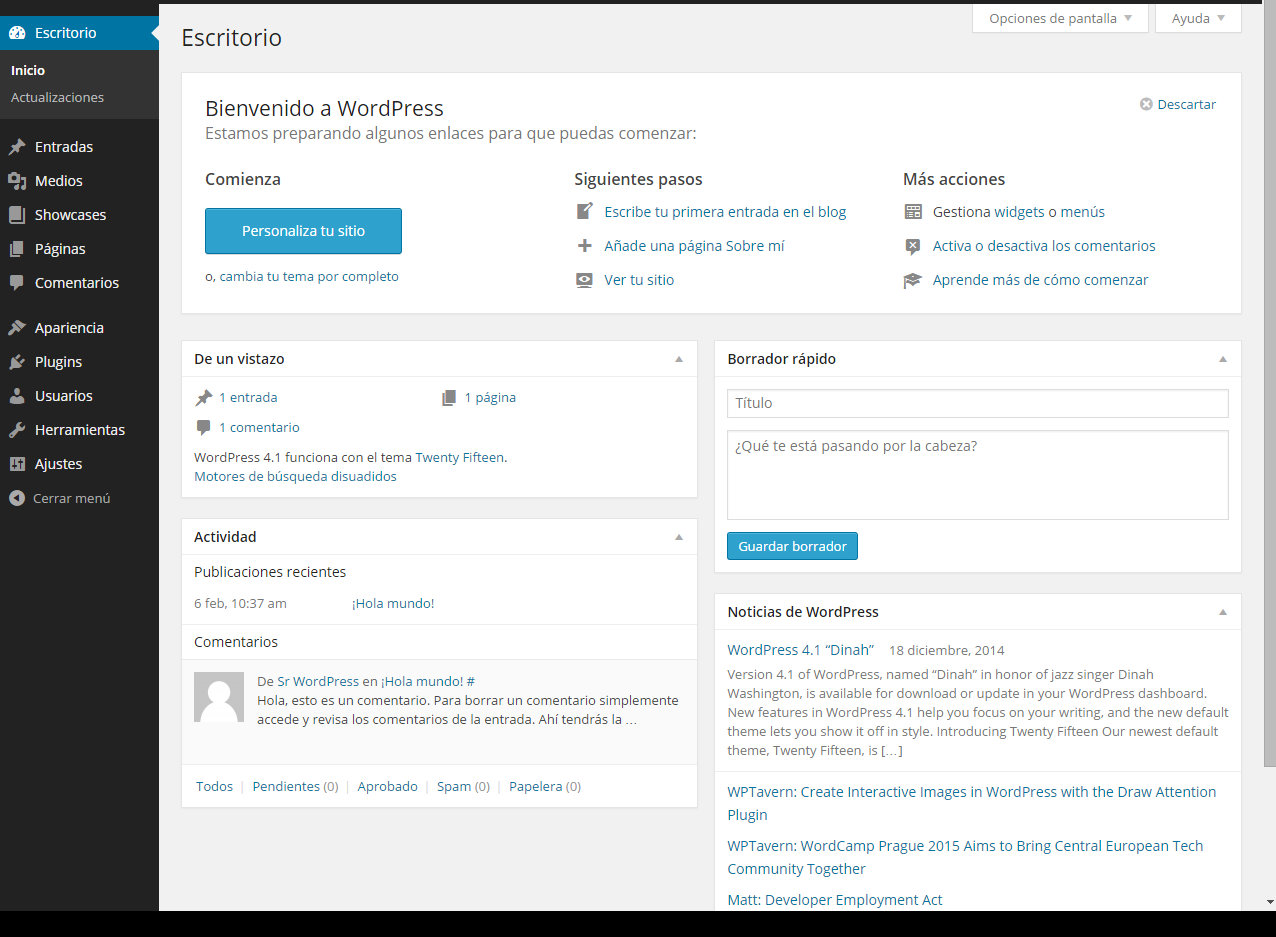
If we have already configured the database and created our WordPress user, we can finally access the administration panel or desktop from the URL of our domain followed by /wp-admin (for example: www.ejemplo.com/wp-admin). This will be our working place from now on to set up our website, starting by choosing a theme and configuring the look and feel, setting up users who can edit the website, and adding pages with content. Our web will automatically apply the changes for each thing we add or change, so from here we can start creating our website to our liking without programming knowledge or great designer skills.
So far we have seen how to create WordPress websites to get started. In the next article we will see how to customize and complete our website, choosing themes, appearance, and adding content.